


| Узбекистан, Бухара, Бухарский институт высоких технологий, 2013 |
Инспектор
Вы можете этот курс.
Опубликован: 06.08.2012 | Уровень: специалист | Доступ: платный
Лекция 11:
Disks
This isn't a boot disk, so we don't need any boot record, and it doesn't make any difference what we select. It's tidier, though, to select None as indicated. Then we press q to exit the partition editor, get back to the function index, and select Label. We see:
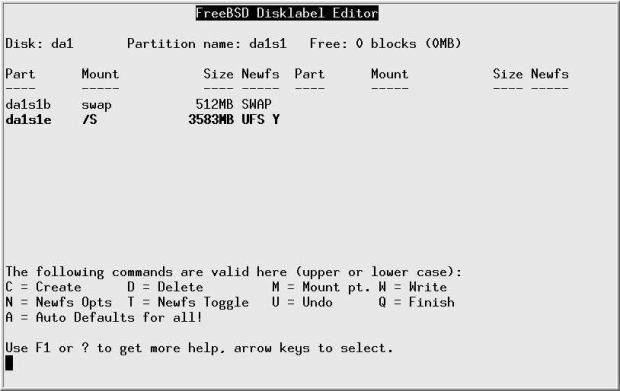
The important information on this rather empty looking menu is the information at the top about the free space available. We want to create two partitions: first, a swap partition of 512 MB, and then a file system taking up the rest of the disk. We press C, and are shown a submenu offering us all 8386733 blocks on the disk. We erase that and enter 512m, which represents 512 MB. Then we press Enter, and another submenu appears, asking us what kind of slice it is. We move the cursor down to select A swap partition :
Next, we press c again to create a new partition. This time, we accept the offer of the rest of the space on the disk, 7338157 sectors, we select A file system , and we are presented with yet another menu asking for the name of the file system. We enter the name, in this case /S:
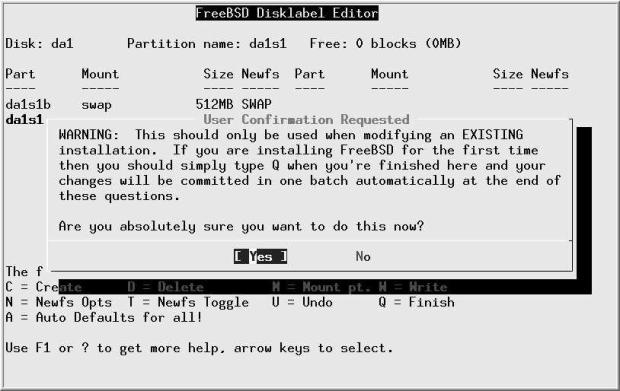
Finally, we press W to tell the disk label editor to perform the function. We get an additional warning screen:
We're doing this online, so that's OK. We select Yes, and sysinstall creates the file system and mounts both it and the swap partition. This can take quite a while. Don't try to do anything with the drive until it's finished.