Опубликован: 06.08.2013 | Доступ: свободный | Студентов: 974 / 64 | Длительность: 27:51:00
Специальности: Программист, Архитектор программного обеспечения, Разработчик интернет-проектов
Теги:
Лекция 2:
Pygame basics
Frames Per Second and pygame.time.Clock Objects
The frame rate or refresh rate is the number of pictures that the program draws per second, and is measured in FPS or frames per second. (On computer monitors, the common name for FPS is hertz. Many monitors have a frame rate of 60 hertz, or 60 frames per second.) A low frame rate in video games can make the game look choppy or jumpy. If the program has too much code to run to draw to the screen frequently enough, then the FPS goes down. But the games in this book are simple enough that this won’t be issue even on old computers.
A pygame.time.Clock object can help us make sure our program runs at a certain maximum FPS. This Clock object will ensure that our game programs don’t run too fast by putting in small pauses on each iteration of the game loop. If we didn’t have these pauses, our game program would run as fast as the computer could run it. This is often too fast for the player, and as computers get faster they would run the game faster too. A call to the tick() method of a Clock object in the game loop can make sure the game runs at the same speed no matter how fast of a computer it runs on. The Clock object is created on line 7 of the catanimation.py program.
7. fpsClock = pygame.time.Clock()
The Clock object’s tick() method should be called at the very end of the game loop, after the call to pygame.display.update(). The length of the pause is calculated based on how long it has been since the previous call to tick(), which would have taken place at the end of the previous iteration of the game loop. (The first time the tick() method is called, it doesn’t pause at all.) In the animation program, is it run on line 47 as the last instruction in the game loop.
All you need to know is that you should call the tick() method once per iteration through the game loop at the end of the loop. Usually this is right after the call to pygame.display.update().
47. fpsClock.tick(FPS)
Try modifying the FPS constant variable to run the same program at different frame rates. Setting it to a lower value would make the program run slower. Setting it to a higher value would make the program run faster.
Drawing Images with pygame.image.load() and blit()
The drawing functions are fine if you want to draw simple shapes on the screen, but many games have images (also called sprites). Pygame is able to load images onto Surface objects from PNG, JPG, GIF, and BMP image files. The differences between these image file formats is described at http://invpy.com/formats.
The image of the cat was stored in a file named cat.png. To load this file’s image, the string 'cat.png' is passed to the pygame.image.load() function. The pygame.image.load() function call will return a Surface object that has the image drawn on it. This Surface object will be a separate Surface object from the display Surface object, so we must blit (that is, copy) the image’s Surface object to the display Surface object. Blitting is drawing the contents of one Surface onto another. It is done with the blit() Surface object method.
If you get an error message like "pygame.error: Couldn't open cat.png" when calling pygame.image.load(), then make sure the cat.png file is in the same folder as the catanimation.py file before you run the program.
39. DISPLAYSURF.blit(catImg, (catx, caty))
Line 39 of the animation program uses the blit() method to copy catImg to DISPLAYSURF. There are two parameters for blit(). The first is the source Surface object, which is what will be copied onto the DISPLAYSURF Surface object. The second parameter is a two-integer tuple for the X and Y values of the topleft corner where the image should be blitted to.
If catx and caty were set to 100 and 200 and the width of catImg was 125 and the height was 79, this blit() call would copy this image onto DISPLAYSURF so that the top left corner of the catImg was at the XY coordinate (100, 200) and the bottom right corner’s XY coordinate was at (225, 279).
Note that you cannot blit to a Surface that is currently "locked" (such as when a PixelArray object has been made from it and not yet been deleted).
The rest of the game loop is just changing the catx, caty, and direction variables so that the cat moves around the window. There is also a call to pygame.event.get() to handle the QUIT event.
Fonts
If you want to draw text to the screen, you could write several calls to pygame.draw.line() to draw out the lines of each letter. This would be a headache to type out all those pygame.draw.line() calls and figure out all the XY coordinates, and probably wouldn’t look very good.
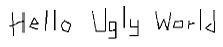
The above message would take forty one calls to the pygame.draw.line() function to make. Instead, Pygame provides some much simpler functions for fonts and creating text. Here is a small Hello World program using Pygame’s font functions. Type it into IDLE’s file editor and save it as fonttext.py:
1. import pygame, sys
2. from pygame.locals import *
3.
4. pygame.init()
5. DISPLAYSURF = pygame.display.set_mode((400, 300))
6. pygame.display.set_caption('Hello World!')
7.
8. WHITE = (255, 255, 255)
9. GREEN = (0, 255, 0)
10. BLUE = (0, 0, 128)
11.
12. fontObj = pygame.font.Font('freesansbold.ttf', 32)
13. textSurfaceObj = fontObj.render('Hello world!', True, GREEN, BLUE)
14. textRectObj = textSurfaceObj.get_rect()
15. textRectObj.center = (200, 150)
16.
17. while True: # main game loop
18.     DISPLAYSURF.fill(WHITE)
19.     DISPLAYSURF.blit(textSurfaceObj, textRectObj)
20.     for event in pygame.event.get():
21.         if event.type == QUIT:
22.             pygame.quit()
23.             sys.exit()
24.     pygame.display.update()
There are six steps to making text appear on the screen:
- Create a pygame.font.Font object (Like on line 12).
- Create a Surface object with the text drawn on it by calling the Font object’s render() method (Line 13).
- Create a Rect object from the Surface object by calling the Surface object’s get_rect() method (Line 14). This Rect object will have the width and height correctly set for the text that was rendered, but the top and left attributes will be 0.
- Set the position of the Rect object by changing one of its attributes. On line 15, we set the center of the Rect object to be at 200, 150.
- Blit the Surface object with the text onto the Surface object returned by pygame.display.set_mode() (Line 19).
- Call pygame.display.update() to make the display Surface appear on the screen (Line 24).
The parameters to the pygame.font.Font() constructor function is a string of the font file to use, and an integer of the size of the font (in points, like how word processors measure font size). On line 12, we pass 'freesansbold.ttf' (this is a font that comes with Pygame) and the integer 32 (for a 32-point sized font).
See http://invpy.com/usingotherfonts for more info on using other fonts.
The parameters to the render() method call are a string of the text to render, a Boolean value to specify if we want anti-aliasing (explained later in this chapter), the color of the text, and the color of the background. If you want a transparent background, then simply leave off the background color parameter in the method call.
Anti-Aliasing
Anti-aliasing is a graphics technique for making text and shapes look less blocky by adding a little bit of blur to their edges. It takes a little more computation time to draw with anti-aliasing, so although the graphics may look better, your program may run slower (but only just a little). If you zoom in on an aliased line and an anti-aliased line, they look like this:

To make Pygame's text use anti-aliasing, just pass True for the second parameter of the render() method. The pygame.draw.aaline() and pygame.draw.aalines() functions have the same parameters as pygame.draw.line() and pygame.draw.lines(), except they will draw anti-aliased (smooth) lines instead of aliased (blocky) lines.
Playing Sounds
Playing sounds that are stored in sound files is even simpler than displaying images from image files. First, you must create a pygame.mixer.Sound object (which we will call Sound objects for short) by calling the pygame.mixer.Sound() constructor function. It takes one string parameter, which is the filename of the sound file. Pygame can load WAV, MP3, or OGG files. The difference between these audio file formats is explained at http://invpy.com/formats.
To play this sound, call the Sound object's play() method. If you want to immediately stop the Sound object from playing call the stop() method. The stop() method has no arguments. Here is some sample code:
soundObj = pygame.mixer.Sound('beeps.wav')
soundObj.play()
import time
time.sleep(1) # wait and let the sound play for 1 second
soundObj.stop()
You can download the beeps.wav file from http://invpy.com/beeps.wav.
The program execution continues immediately after play() is called; it does not wait for the sound to finish playing before moving on to the next line of code.
The Sound objects are good for sound effects to play when the player takes damage, slashes a sword, or collects a coin. But your games might also be better if they had background music playing regardless of what was going on in the game. Pygame can only load one music file to play in the background at a time. To load a background music file, call the pygame.mixer.music.load() function and pass it a string argument of the sound file to load. This file can be WAV, MP3, or MIDI format.
To begin playing the loaded sound file as the background music, call the pygame.mixer.music.play(-1, 0.0) function. The -1 argument makes the background music forever loop when it reaches the end of the sound file. If you set it to an integer 0 or larger, then the music will only loop that number of times instead of looping forever. The 0.0 means to start playing the sound file from the beginning. If you pass a larger integer or float, the music will begin playing that many seconds into the sound file. For example, if you pass 13.5 for the second parameter, the sound file with begin playing at the point 13.5 seconds in from the beginning.
To stop playing the background music immediately, call the pygame.mixer.music.stop() function. This function has no arguments. Here is some example code of the sound methods and functions:
# Loading and playing a sound effect:
soundObj = pygame.mixer.Sound('beepingsound.wav')
soundObj.play()

# Loading and playing background music:
pygame.mixer.music.load(backgroundmusic.mp3')
pygame.mixer.music.play(-1, 0.0)
# ...some more of your code goes here...
pygame.mixer.music.stop()
Summary
This covers the basics of making graphical games with the Pygame framework. Of course, just reading about these functions probably isn't enough to help you learn how to make games using these functions. The rest of the chapters in this book each focus on the source code for a small, complete game. This will give you an idea of what complete game programs "look like", so you can then get some ideas for how to code your own game programs.
Unlike the "Invent Your Own Computer Games with Python" book, this book assumes that you know the basics of Python programming. If you have trouble remembering how variables, functions, loops, if-else statements, and conditions work, you can probably figure it out just by seeing what’s in the code and how the program behaves. But if you are still stuck, you can read the "Invent with Python" book (it’s for people who are completely new to programming) for free online at http://inventwithpython.com.